How to Purl Stitch for Beginners: What You Need to Know
The purl stitch is the second foundational stitch in knitting. Once you learn how to purl, you unlock an entire world of textures, patterns, and stitch combinations—from ribbing and stockinette to more advanced designs.
If the knit stitch is the backbone of knitting, the purl stitch is its perfect partner.
Don’t worry if it feels a little awkward at first. Many beginners find purling slightly trickier than knitting, but with a slow, clear method, it quickly becomes second nature.
What Is the Purl Stitch?
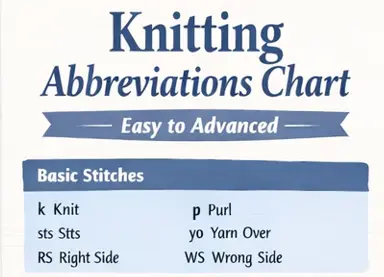
The purl stitch (abbreviated “p” in patterns) is one of the two basic stitches in knitting. It is essentially the reverse of the knit stitch.
When you knit one row and purl the next, you create stockinette stitch—the smooth, classic fabric you see in sweaters, hats, and many modern knitting patterns.
You’ll see the purl stitch used in:
- Ribbing (like k1, p1 patterns)
- Stockinette stitch projects
- Sweaters and cardigans
- Hats and socks
- Textured stitch patterns
Once you learn to purl, you officially have the two core skills needed to follow most knitting patterns.
What You’ll Need
Before you begin, gather these beginner-friendly supplies:
- Yarn: Medium-weight yarn (Category 4 / Worsted)
- Needles: Size US 8 (5 mm) straight or circular needles
- Scissors
- Patience and a relaxed grip
Tip: Just like when learning to knit, light-colored yarn makes it much easier to see your stitches.
Step 1: Cast On Your Stitches
Before you can purl, you need stitches on your needle.
Cast on about 20 stitches using a beginner-friendly method like the long-tail cast on. Once your stitches are cast on:
- Hold the needle with stitches in your left hand
- Hold the empty needle in your right hand
- Keep the working yarn in front of your work (this is key for purling)
Unlike the knit stitch, the yarn stays in front when purling.
Step 2: Position Your Needles Correctly
Hold your needles so the tips point toward each other, forming a small “X.”
Your left needle should contain all the stitches, and your right needle should be empty and ready to work.
Keep your hands relaxed—tight tension makes purling much harder for beginners.
Step 3: Insert the Right Needle Into the Stitch
Insert the right needle into the first stitch on the left needle:
- Go from back to front
- The right needle should enter the stitch toward you
- The needles will cross in front rather than behind
This is the opposite direction of the knit stitch.
Step 4: Wrap the Yarn Around the Needle
With the working yarn in front of your work:
- Wrap the yarn counterclockwise around the right needle
- The yarn should pass over and around the tip of the right needle
This wrap is what forms your new purl stitch.
Take your time here—slow movements help build muscle memory.
Step 5: Pull the New Loop Through
Use the tip of the right needle to gently pull the wrapped yarn through the stitch.
You should now see a new loop forming on the right needle.
If the yarn slips off, simply try again slowly. This is one of the most common beginner learning moments.
Step 6: Slide the Old Stitch Off
Carefully slide the old stitch off the left needle while keeping the new loop on the right needle.
Congratulations—you just made your first purl stitch!
Step 7: Repeat Across the Row
Continue repeating:
- Insert the needle (back to front)
- Wrap the yarn in front
- Pull the loop through
- Slide the stitch off
Work across the entire row until all stitches move to your right needle.
You’ve now completed a full purl row!
Step 8: Keep Practicing the Purl Stitch
To continue practicing:
- Switch the full needle back to your left hand
- Purl every stitch across again
When you purl every row, you create reverse garter stitch, which has a smooth, slightly bumpy texture on the opposite side of regular garter stitch.
What Should Your Purl Stitches Look Like?
Your fabric should:
- Show small horizontal bumps on the front
- Look even (not overly tight or loose)
- Feel soft and flexible
Uneven stitches are completely normal when learning. Consistency improves quickly with practice.
Common Beginner Mistakes (And How to Fix Them)
My yarn keeps getting tangled in front
Make sure the yarn stays in front only while purling and move it between stitches as needed.
My stitches are too tight
Loosen your grip and avoid pulling the yarn too tightly after each stitch.
I accidentally made extra stitches
Check that you are inserting the needle into the stitch itself, not the space between stitches.
Purling feels slower than knitting
This is normal! Most beginners find purling less intuitive at first.
Easy Practice Project Ideas
Once you’re comfortable with the purl stitch, try:
- A stockinette stitch square (knit one row, purl one row)
- A simple ribbed scarf (k1, p1)
- A beginner dishcloth with knit and purl rows
These projects reinforce muscle memory and help you transition into real patterns.
What’s Next After Learning to Purl?
Now that you know both the knit stitch and the purl stitch, you can create:
- Ribbing (k1, p1 or k2, p2)
- Stockinette stitch
- Seed stitch
- Beginner sweaters and hats
Together, knit and purl stitches form the foundation of nearly every knitting pattern you’ll ever use.
Final Encouragement
Purling may feel slightly awkward at first, especially if you just learned the knit stitch—but that’s completely normal. Every experienced knitter once struggled with their first purl row.
Practice slowly, keep your tension relaxed, and celebrate small progress.
You’re no longer just learning to knit—you’re learning to read and create real knitting fabric!