A Guide on How to Begin Knitting: The Cast On
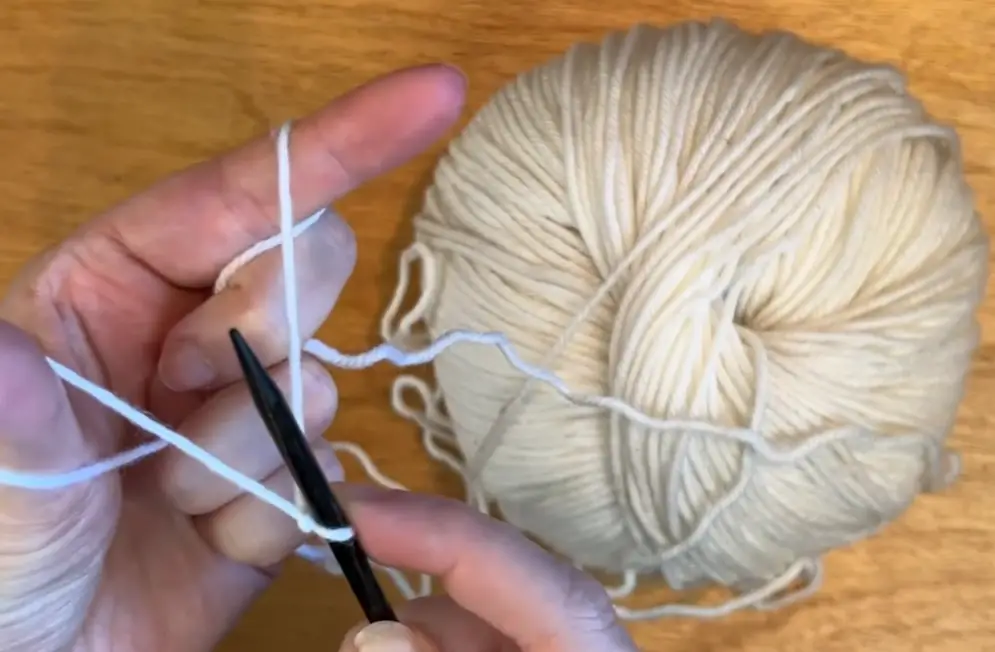
This lesson will take you through how to perform a Single Cast-On using step by step written instructions and video. To start this project, you will have to know how to form a Slip Knot. But we have you covered! Instructions for slip knots are also included in the video below. Once you have cast-on then you will be ready to try the Knit Stitch.
There are a variety of different methods for casting-on in knitting, the Single Cast-On being one of the simplest. You may also see this approach referred to as the thumb cast-on or the backward loop cast-on. When you begin following the instructions, the reasons for these aliases will become evident to you.
The Single Cast-On creates a very fine, loose edge to your knitting project. Which may be exactly what you are looking for and works particularly well with Lace Stitches. Additionally, when you encounter any patterns that require you to cast-on in the middle of a project, then the Single-Cast on may just be the ticket due to its quick and easy nature.
The Single Cast-On is one of the simplest methods to use! It is so straight-forward that it is likely the most common method first taught to beginners. But it does have some drawbacks. It can be a little difficult to maintain an even tension while knitting the first row of your project. This will leave you with super tight stitches or large loopy ones (or hopefully not, but a combination of the two). The solution to which is to take the first row slowly and ensure you are keeping an even tension.
Once you have made a Slip Knot with your yarn you are ready to begin casting on.
Instructions for the Cast On
1. Holding a needle in your right hand, slide the Slip Knot onto the needle and pull the yarn to tighten the knot. The knot should be tight enough that the yarn doesn’t slip off the needle…but not so tight that you can’t move the knot along the needle with your fingers.
2. Take the working yarn in your left hand and grasp it between your fingers and your palm by making a loose fist. Pull the yarn so it’s lightly taught and place your thumb over the top of the yarn.
3. Push down and rotate your thumb around the back of the yarn and then towards you so that the yarn is now looped once around your thumb.
4. Bring your thumb into a upright position, like you are trying to catch a ride hitchhiking. Take the needle in your right hand and slip it between the yarn and the base of your thumb, so the needle moves upwards, relative to your left hand.
5. Pull your thumb down, out of the loop thereby transferring it entirely to the knitting needle. Pull the yarn to tighten the loop on the needle (but not too tight).
6. You should have your slip knot plus a new loop on your right-hand needle. Continue the process until you have the desired number of stitches that your knitting project requires.
Fantastic work! Now check out stitches recommended for beginners!
Want to try another way to cast-on? Check out the below tutorial that we had created for you! This cast-on is a little more difficult until you get a hang of it but it will create nicer edges on your projects!


