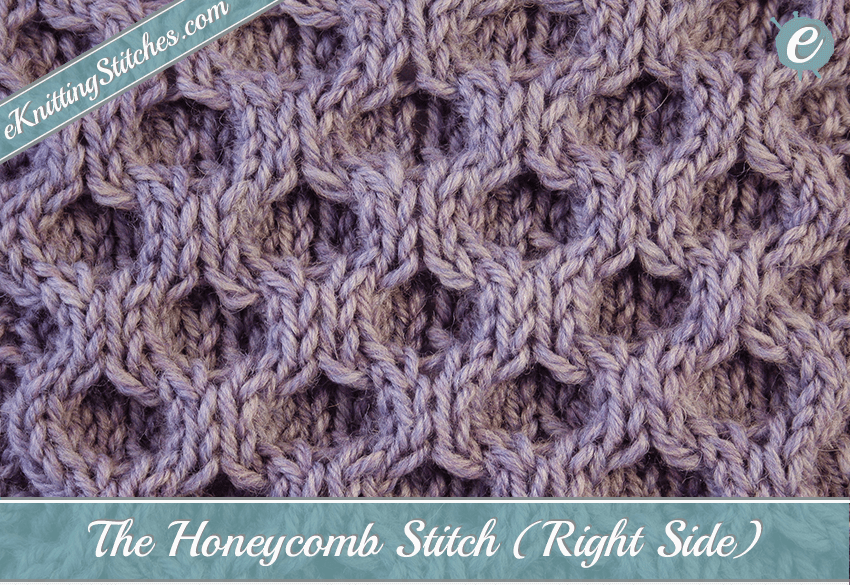
The Honeycomb Cable Stitch is a striking Cable Stitch that produces a beautiful honeycomb pattern.
This stitch gives a more rugged, raised texture than the Honeycomb Slip Stitch, and is perfect for thick wooly jumpers or hats.
This stitch, is very easy to master, as it only involves two cables (Cable four forward/Cable four backward) on a stockinette stitch backdrop.
Looking to get started, well lets move on to the instructions…
Instructions
Cast on any multiple of eight stitches for your project.
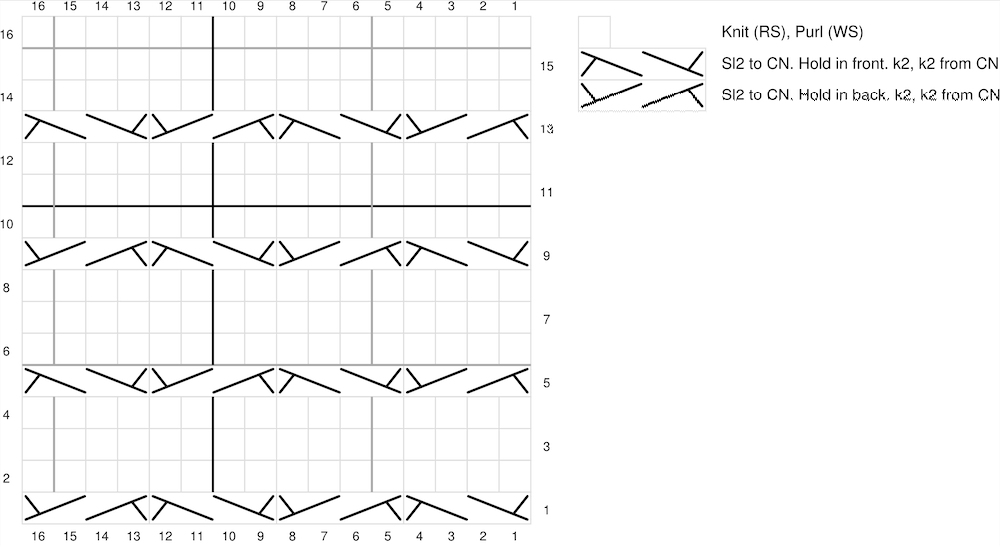
The first row of this stitch is entirely an eight stitch repeating pattern. Begin by cabling four back; slip two stitches onto your cable needle and hold them to the back of your work, knit two from the working (left-hand) needle then knit the two stitches from your cable needle. Follow this by a cable four forward; again slip two stitches onto your cable needle but this time, hold it in front of the work, knit two stitches from your working needle and then knit the two stitches from your cable needle. Repeat these two cables across the whole row.
The second row (and all even rows), simply purl all the stitches. For the third row, knit all the stitches
If you’ve been paying attention, you’ll have purled all the stitches in the fourth row. Then for the fifth row, again we have an eight stitch repeat; first, cable four forward just as you did for the first row, and then cable four backward. Keep repeating this along the row.
As mentioned above, for rows six, seven and eight, alternate between purling all stitches, then knitting all stitches, then purling all stitches again.
Once you have completed row eight, continue repeating rows 1-8 until you have the desired size.
Honeycomb Cable Stitch Chart

Honeycomb Cable Swatch Examples


