Seams provide clothes structure and strength, as well as giving final items a professional, fitted look. By eliminating the biasing and stretching that is common in garments manufactured without seams, they enable a sweater to keep its form and seem new after years of usage. Seaming may become a straightforward and pleasurable activity with expert outcomes as repeatable as the knit stitch itself if you learn the component pieces.
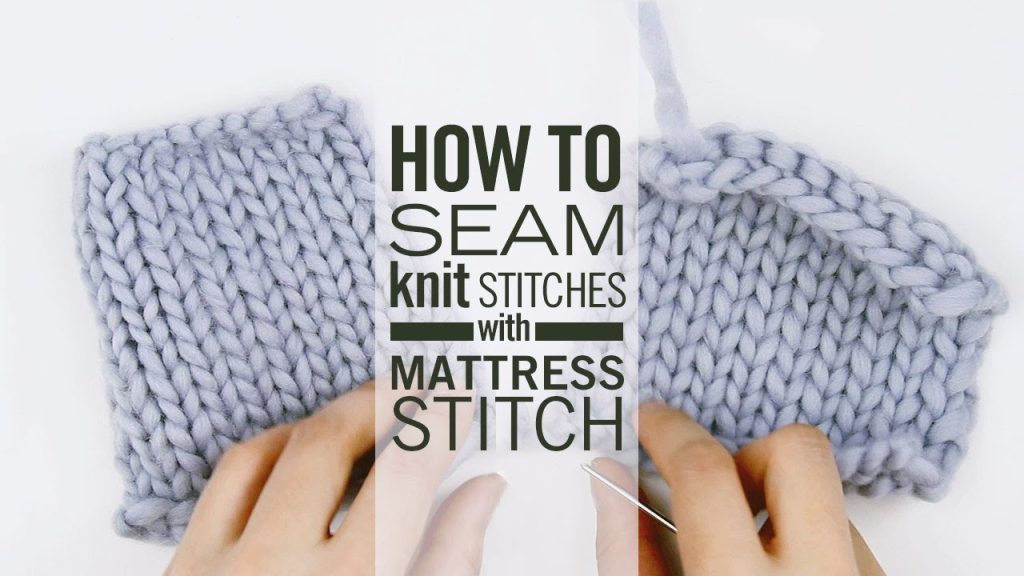
Mattress stitch is an excellent seaming method for knitting seams. Sewing knit seams is one of the most crucial skills to master while knitting. After all, you’ve spent hours, days, weeks, and maybe months knitting something beautiful, and it can be easily damaged if it isn’t correctly sewed up. The mattress stitch is also extremely simple to master. It’s most well-known for stitching vertical seams, such as those seen on the sides of a sweater. You may, however, apply it anywhere you believe it would be useful.
It’s impossible to avoid learning the mattress stitch if you wish to link two knitted items together. This vertical seaming method creates this undetectable connection between two items done in stockinette stitch or other stitch patterns with a knit stitch edge. Read on to know more about this method.
Instructions

- Thread a blunt tapestry needle with a separate piece of seaming yarn. You’ll need around twice as much yarn as the seam’s finished length. Then, with the knit side (right side) facing you, put the two knitted pieces you wish to connect side by side. Make sure one of them isn’t facing the wrong way.
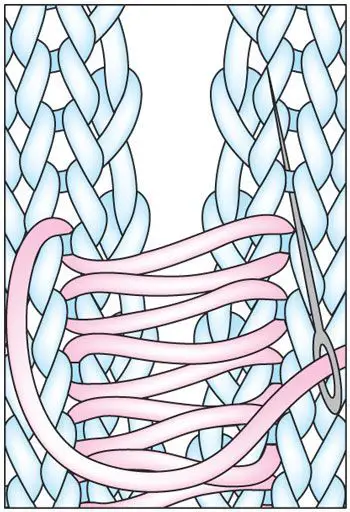
- On the right piece, find the first column of stitches and move below the first bar between two knit stitches. To begin your mattress stitch, proceed through the first bar.
Seaming might begin on any side, but I always begin on the right side. Find the first column of knit stitches and go in between them with your tapestry needle in either case. Between the “V”s of two adjacent knit stitches, there should be a little bar. It has the appearance of a little ladder. Pull your tapestry needle through the first bar from beneath.
If you’re using a different piece of seaming yarn, leave a 5-7-inch tail for later weaving in the end.

- On the left side, go below the first bar between two knit stitches, and also through the first bar on the opposite knitted piece. Next, look for the piece’s first column of stitches. Then, between the first two stitches, run your needle below the bar (bottom to top).
- To continue the mattress stitch, draw the yarn through the next bar on the right piece, then through the second bar on the right piece. Return to the first piece and drag your tapestry needle through the bar right above the one you previously went through.
Depending on your particular tastes and the density of the cloth, you can go through two bars at once. You won’t detect a change if you’re knitting with extremely small needles (say, 3.00mm and lower). However, you must choose one method to get an equal and unnoticeable seam.
- Draw the yarn through the next bar on the left side going through the second bar on the left piece again. Return to the left side of the work and pull the yarn below the second bar as well.
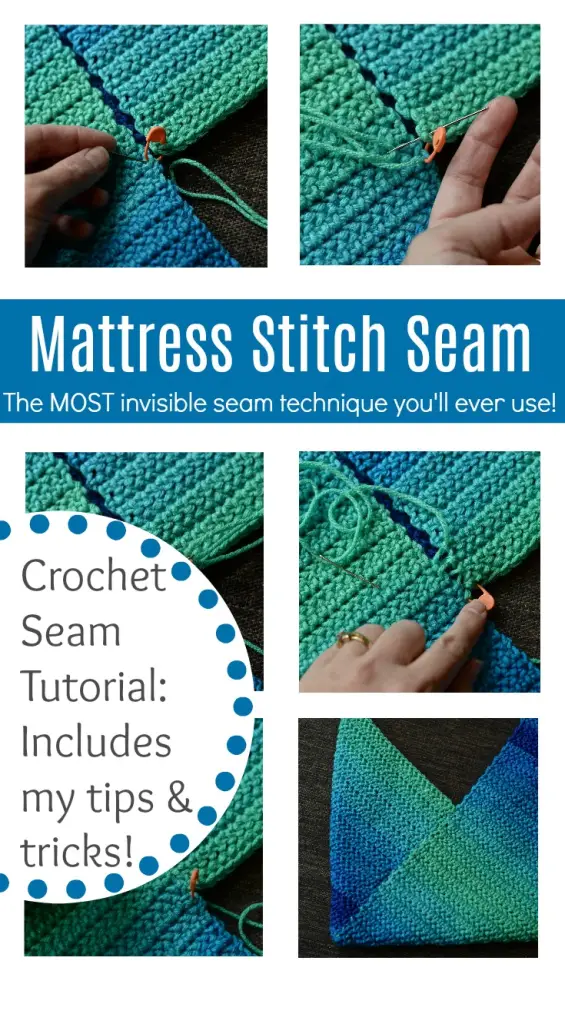
- Do steps 4–5 while tugging on the yarn every few stitches. Continue picking up the bars with your tapestry equally on both sides as you walk back and forth between the two knitted portions. To close the seam, tug on the yarn every inch or so stitches. Don’t yank too hard. Your seam will buckle if you don’t! If it happens, gently stretch it out before continuing seaming.
- Weave the ends in. Give the tail(s) a little pull after you’ve completed seaming. The cloth should not buckle, but there should also be no excess in between. If you pull too hard, gently massage the seam back into place. After that, take the tapestry needle and weave the tails in along the backside seam.
Some notes to consider
From the right side, the final mattress stitch join will be nearly undetectable. It will look like one continuous stockinette stitch line. However, there is a little seam on the incorrect side. If you join the second or third column of knit stitches instead of the first two, the seam will be larger. While I don’t suggest it, it may be used as a last option to reduce the size of a too-large sweater. Also, certain stitch designs don’t provide a good edge, therefore the second column may be preferable.
There are also bars between the V’s of the knit stitch and between two knit stitches. It doesn’t matter which bar you choose as long as both sides have the same kind of bar.
Tips for a Better Mattress Stitch

This seaming technique is simple and basic. However, joining two pieces in a basic stockinette stitch is much easier than joining two pieces in more intricate designs or with difficult yarns. Here are some helpful hints:
- You can leave a long enough tail if you know you’ll be stitching your knitting ahead of time. It will save you from having to weave another yarn end in.
- Use the same yarn as you used to knit your pieces. If it’s particularly thick, you could try to locate a thinner yarn that’s similar to the same color as the one you used. Alternatively, you may use embroidery thread. Embroidery thread comes in a variety of hues, so you’re likely to find one that goes with your project. Use a length of yarn that is no longer than 16 inches. After a time, the stitching wears it down.
- Hold the seam between your fingers. This makes joining them with a mattress stitch simpler and quicker. You may also pull it closer to your face this way, which will make locating the next bar you need to travel through a little simpler.
- Use pins to lock them in place. Some yarns have a lot of fuzziness to them. It may also be difficult to distinguish the next bar if you are holding two strands of yarn at the same time. It will be considerably more difficult if there are any increases in between.
That’s why the seam may be pinned in place. It’s unlikely that skipping one bar will be apparent in the end. Your seam will pucker if there is a larger imbalance. However, if you pre-pinned the seam, you will be able to a) detect and b) correct it.

- Add a selvage stitch for a fair isle. Fair Isle or stranded knitting may not always provide the cleanest edge. Or, to be more precise, not an edge where the bars between a V are plainly distinguishable. Even if you can, you’re likely to pull on a float or anything else that will snag your seam.
As a result, adding two selvage stitches might be really beneficial. After seaming, half of that selvage stitch won’t be visible, so it’s less of an issue than you may think.
- Be careful when unraveling a mattress seam. Even if you take additional precautions, you may miss a few bars and your seam puckers. One thing to keep in mind is that all of the weaving in and out puts a lot of strain on the yarn. Therefore, just take out the whole seam. Make no attempt to reverse-engineer it. Simply tug on it until the whole seam unravels in one pull.
If this isn’t feasible (due to the lack of a separate seaming yarn or the length of the seam), snip the yarn short every now and then so you don’t have to pull the whole length of it through each stitch.
- Don’t or (do) weave in the tails through the ridge on the backside. Unlike your stockinette stitch, the seam you make using a mattress stitch has no flexibility. One thing I often see is individuals weaving in the ends by going through the seam’s ridge. This will strengthen it even more and remove even more elasticity.
This may or may not be what you want, depending on where your seam is. If it isn’t, just weave the tail in at the seam’s very borders without going all the way to the other side.