The Purl Ridge Stitch
The Purl Ridge stitch is a simple variation on the Stockinette Stitch and a member of the Knit & Purl Stitch family.
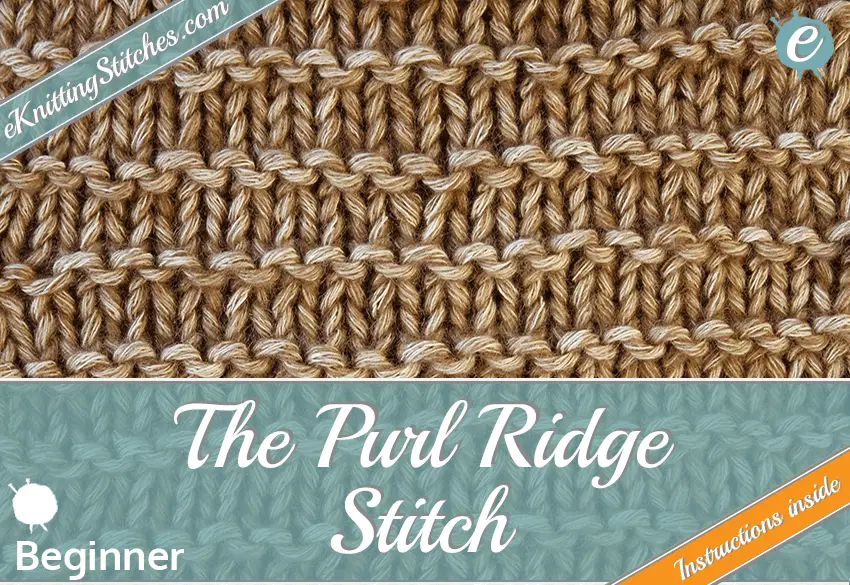
The stitch produces raised rows of “purl bumps” across the fabric. This is achieved by creating a purl ridge every four rows. Although the width between these ridges can be varied depending on the look you are after.
The ridges are only visible on the right side of the fabric, with the wrong side looking like a standard garter or stockinette (WS) pattern. It’s a very versatile stitch that will lend itself well to a multitude of projects! This stitch can be especially useful for adding a bit more detail to a simple pattern.
Wanting to crack on? Ok, let’s move on to the instructions!
Difficulty level:

Cast on:
Cast on any multiple of stitches for your project.
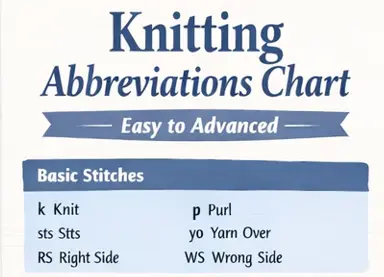
Techniques Used in this Stitch:
k – knit
p – purl
Instructions
Cast on any multiple of stitches for your project. The first row consists entirely of knit stitches.
For the second row, again knit all the stitches. This row is your “ridge”, as in a normal Stockinette Stitch pattern you would purl this row.
The third row again, consists entirely of knit stitches.
Lastly, the fourth row consists entirely of purl stitches.
Once you have completed row 4, continue repeating rows 1-4 until you have the desired size.
If you want to vary the width between the ridges, simply add extra rows of Stockinette Stitch before repeating the pattern e.g. adding a row 5 (k all) and row 6 (p all) will create a six-row gap between the ridges.
Traditional Instructions
- Row 1: k all stitches.
- Row 2: k all stitches.
- Row 3: k all stitches.
- Row 4: p all stitches.
Repeat rows 1-4 to desired length.
Purl Ridge Stitch Chart

Purl Ridge Stitch Swatch Examples


Tried out this stitch and want to explore some more? Check out other Knit & Purl stitches or our full Knitting Stitches library for more information!
Additionally, check out our collection of information on different yarn types and what will work best for your next project with this stitch!