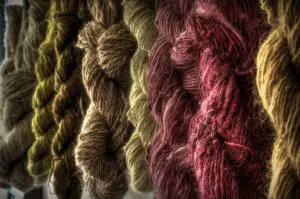
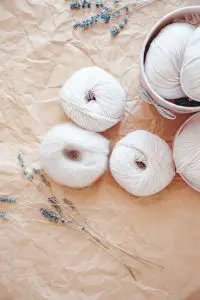
Dyeing yarn is a fascinating process that allows knitters and fiber enthusiasts to add a personal touch to their projects! If you are looking to create unique color combinations, match a specific aesthetic, or simply explore your creative side, dyeing yarn offers endless possibilities. Let’s explore why you might want to dye yarn, the potential benefits it brings to your knitting projects, and provide a basic guide on how to dye yarn at home.
Why Dye Yarn?
Personalization
Dyeing yarn allows you to create a truly one-of-a-kind color palette for your projects! You can tailor the colors to match your personal style, the recipient’s preferences, or the overall theme of a specific project. It gives an opportunity to express your creativity and make your knitted items truly unique.
Customization
Dyeing your own yarn can give you the freedom to achieve the exact shades and combinations you desire. Doing this can be incredibly useful when you are working on a large project or design that requires specific color schemes that might be hard to find. You can match existing yarns, create gradients, or experiment with variegated effects to achieve the perfect look.
Sustainability
Dyeing yarn at home allows you to have greater control over the materials and methods used. You can choose environmentally friendly dyes, us more natural dyes to avoid chemicals, and reduce the carbon footprint associated with commercially dyed yarns. You can even repurpose or upcycle yarns, which would contribute to a more sustainable and mindful approach to your knitting practice.

The Benefits of Dyeing Yarn
Creative Freedom
Dyeing yarn empowers you to explore your imagination and experiment with various dyeing techniques. You can blend colors, layer dyes, or even try hand-painting techniques to achieve unique and stunning results. This process encourages artistic expression and can inspire new design ideas.
Cost-Effective
Dyeing your own yarn can be a budget-friendly alternative to purchasing pre-dyed yarns. You can often find undyed or natural-colored yarns at lower prices, and with a small investment in dyes and equipment, you can create an array of beautiful colors.
Skill Development
Dyeing yarn offers an opportunity to learn and refine your skills. Learning how to dye yarn can enhance your knowledge of fibers, dyes, and the overall dyeing process. As well as improving you understanding of color theory and dye compatibility to mastering different dyeing techniques. All in all, these skills can further enrich your knitting journey and open doors to more advanced techniques.

How to Dye Yarn
Prepare Your Workspace
Set up a dedicated space for dyeing, ideally in a well-ventilated area. Gather your materials, including dyes, containers, gloves, measuring tools, and a heat source (stovetop or microwave). Protect your work surface with plastic or a drop cloth.
Choose Your Dye
Select the dye type based on your preference and the fiber content of the yarn. For example, acid dyes are commonly used for animal fibers (such as wool), while fiber-reactive dyes work well with plant-based fibers (like cotton or bamboo). Follow the manufacturer’s instructions for dye-to-water ratios and color mixing.
Prepare the Yarn
If working with undyed yarn, soak it in water to ensure even dye absorption. If dyeing already knitted or crocheted items, consider using a technique called “kettle dyeing” to achieve a variegated effect.
Apply the Dye
Depending on the technique, apply the dye to the yarn using methods like immersion dyeing, hand-painting, or dip-dyeing. Experiment with different application techniques to achieve your desired effects.
Heat-Setting
Follow the instructions specific to your dye type and fiber content to heat-set the dye. This step ensures that the color bonds with the yarn fibers and becomes permanent. Common heat-setting methods include steaming, simmering, or baking the yarn, depending on the dye and fiber used. Carefully monitor the temperature and duration required for heat-setting to achieve optimal results.
Rinse and Wash
Once the yarn has been heat-set and cooled, rinse it thoroughly in lukewarm water to remove any excess dye. Continue rinsing until the water runs clear. Additionally, you may add a mild detergent or wool wash during the final rinse to remove any remaining dye or chemicals. Gently squeeze out excess water without wringing or twisting the yarn.
Dry and Finish
Lay the rinsed yarn flat on a clean towel or drying rack to air dry. Avoid direct sunlight, as it can cause fading or damage to the dyed colors. Once the yarn is fully dry, wind it into a skein or ball, ready to be used for your knitting or crochet projects.
Document and Experiment
Keep track of your dyeing process, including the dye types, color combinations, and techniques used, in a notebook or digital record. This will help you replicate successful results or make adjustments for future dyeing projects. Above all, feel free to experiment with different dye methods, color blends, or even try over-dyeing previously dyed yarn to create unique effects.
Safety Considerations
When you are dyeing yarn, it is very important to follow safety precautions. Wear gloves to protect your hands from dyes and chemicals, work in a well-ventilated area, and avoid inhaling dye particles. Follow the manufacturer’s instructions and dispose of leftover dyes and chemicals responsibly.
Remember, the dyeing process is highly customizable, and there are numerous techniques and variations to explore. As you gain experience, you can delve into more advanced methods such as tie-dye, resist dyeing, or natural dyeing using plant-based materials.